
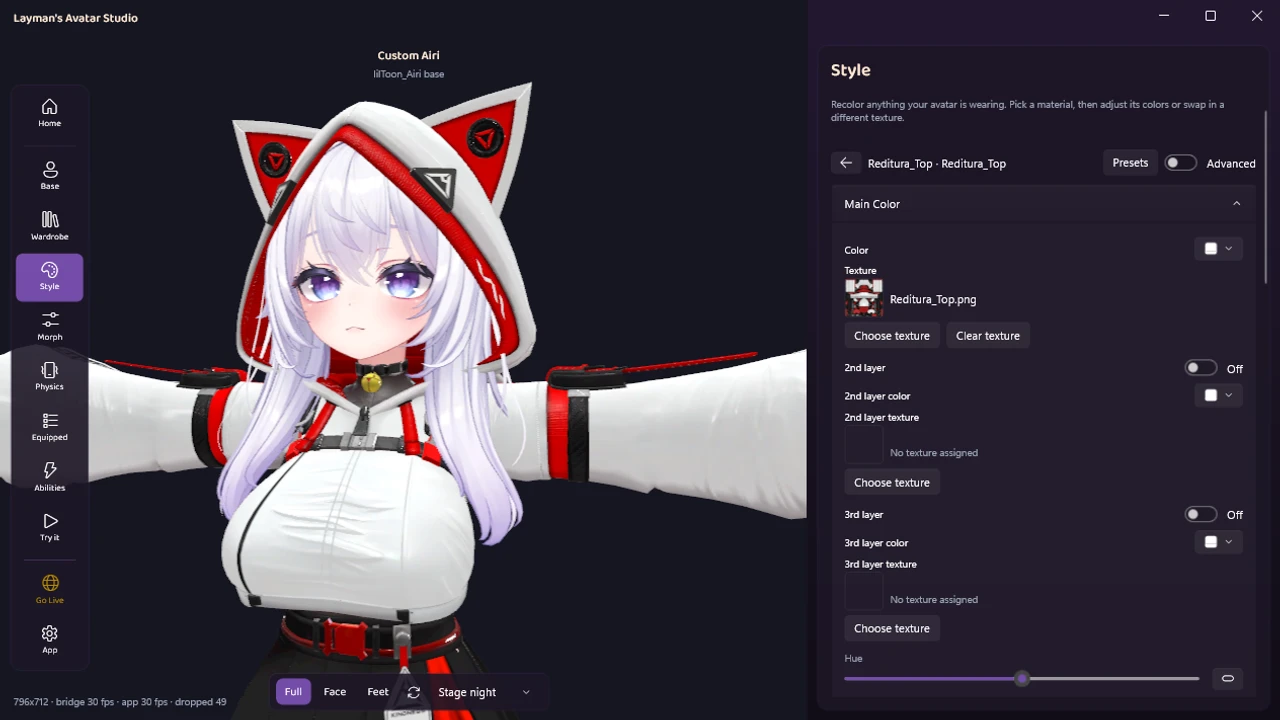
Here is the whole pitch in two pictures. This avatar’s hoodie top started white:
One drag of a color wheel later, it is red, and the change happened on the live avatar while dragging, not in an image editor and not in Unity:
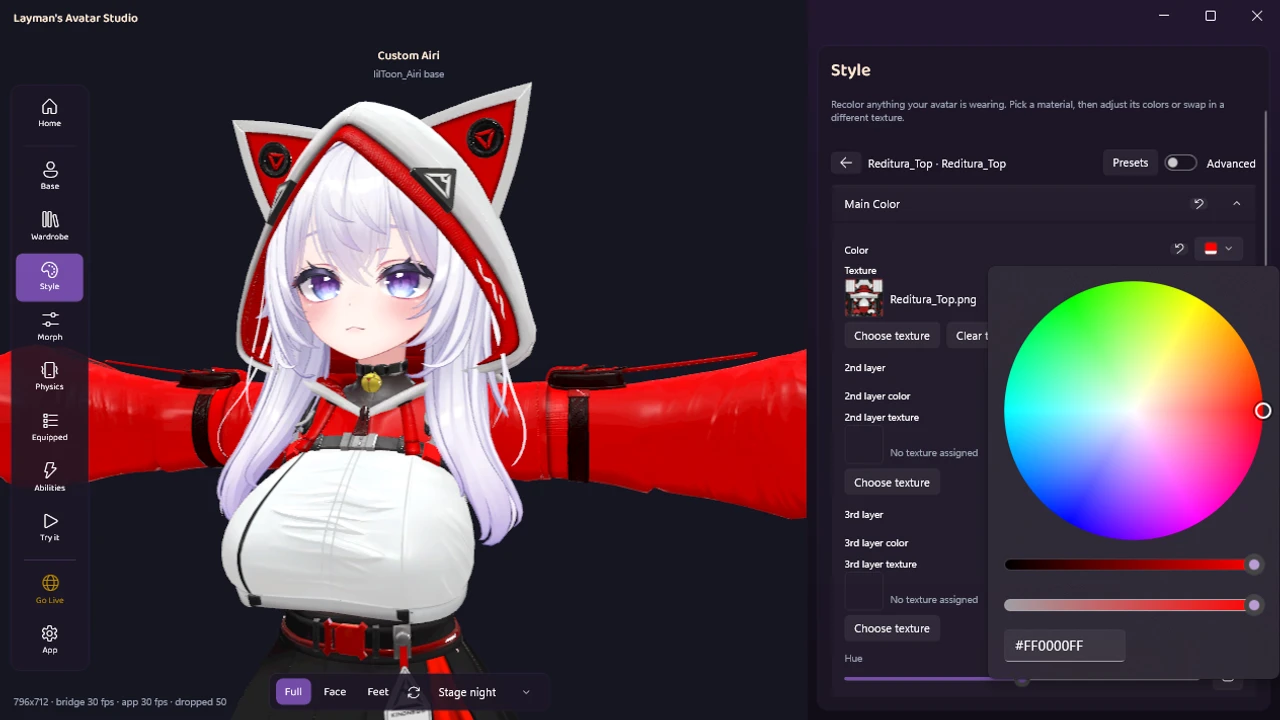
That is what this post shows off: recoloring in Layman’s Avatar Studio, where changing your VRChat avatar’s colors means picking a part and picking a color. We will also map the other ways people recolor avatars today, because they matter, and be honest about what recoloring can and cannot do. One disambiguation first: if you wanted to switch which avatar you are wearing in-game, that is a different task (press R for the action menu). This post is about changing the colors of an avatar you own.
What recoloring actually means
Your avatar’s colors live in its materials. A material is the recipe for how a part looks: a texture (the painted image wrapped around the mesh) plus shader settings (tint colors, shading behavior, extra layers). Recoloring means changing that recipe, and there are two fundamentally different depths: adjusting the material’s color settings, which is fast and reversible, or repainting the texture itself, which is deep surgery with the most control.
A useful aside while we are here: if your avatar shows up entirely pink, that is not a color problem. Pink is the missing-shader error, and the fix is a dependency, not a recolor.
The four ways people recolor today
Worth knowing even if you only ever use one, because they trade off differently.
1. In the game itself
Some avatars ship with color options built into their expressions menu. If the creator made them, they are the easiest recolor in existence. But the options are only what the creator predefined, and most avatars have few or none. You cannot add options from inside VRChat, because that is decided when the avatar is built.
2. Shader color settings, in Unity
Every material on your avatar has color settings in its shader, and changing a tint there recolors the part without touching the texture. Fast, reversible, and how experienced people do quick recolors. The cost of entry is the whole Unity pipeline: project, imports, finding the right material in the inspector, knowing which of the shader’s many fields is the one you mean, and re-uploading to see it in-world.
3. Editing the texture, in an image editor
Open the texture (ideally the layered PSD many creators include) in an image editor, recolor the layers you mean, export, and apply it back in Unity. This is the most powerful route: patterns, gradients, painted details, anything. It is also the most work, it wants image-editing skills and software, and it is destructive in the sense that you are now maintaining your own edited texture files. For changing “the jacket from white to red,” it is honestly overkill.
4. Recolor tools
The community builds tools for this gap too, especially in the Japanese scene, where texture recoloring apps like VRC Color Changer are popular and genuinely good. They automate the texture route’s grunt work. Most still hand the result back to Unity for applying and uploading, so they shorten the pipeline rather than remove it.
Notice the pattern: every route either caps out at creator-made presets or runs through Unity eventually. That is the gap the rest of this post lives in.
Recolor live in LAS: pick a part, spin the wheel
LAS’s Style panel is route 2, the fast shader-level recolor, with the Unity part removed and your eyes put in the loop. Here is the flow from the captures above.
Pick the part. Open Style and click the part of the avatar you want to change. The panel shows that material’s settings: its color, its texture, and its layers. No hierarchy spelunking, no guessing which material owns the sleeve.
Spin the wheel. The color control is a wheel with brightness and saturation sliders, swatches, and a hex field for when you have an exact color in mind. The avatar updates live as you drag. That live feedback sounds like a convenience and turns out to be the whole game: you stop imagining what a color might look like and start seeing it.
Give every part its own color. Each material has its own settings, so the sleeves, the chest piece, the hair, and the shoes can each go their own way. That also makes color matching across parts practical: recolor one part, then nudge the second onto it while comparing them live, side by side on the same avatar.
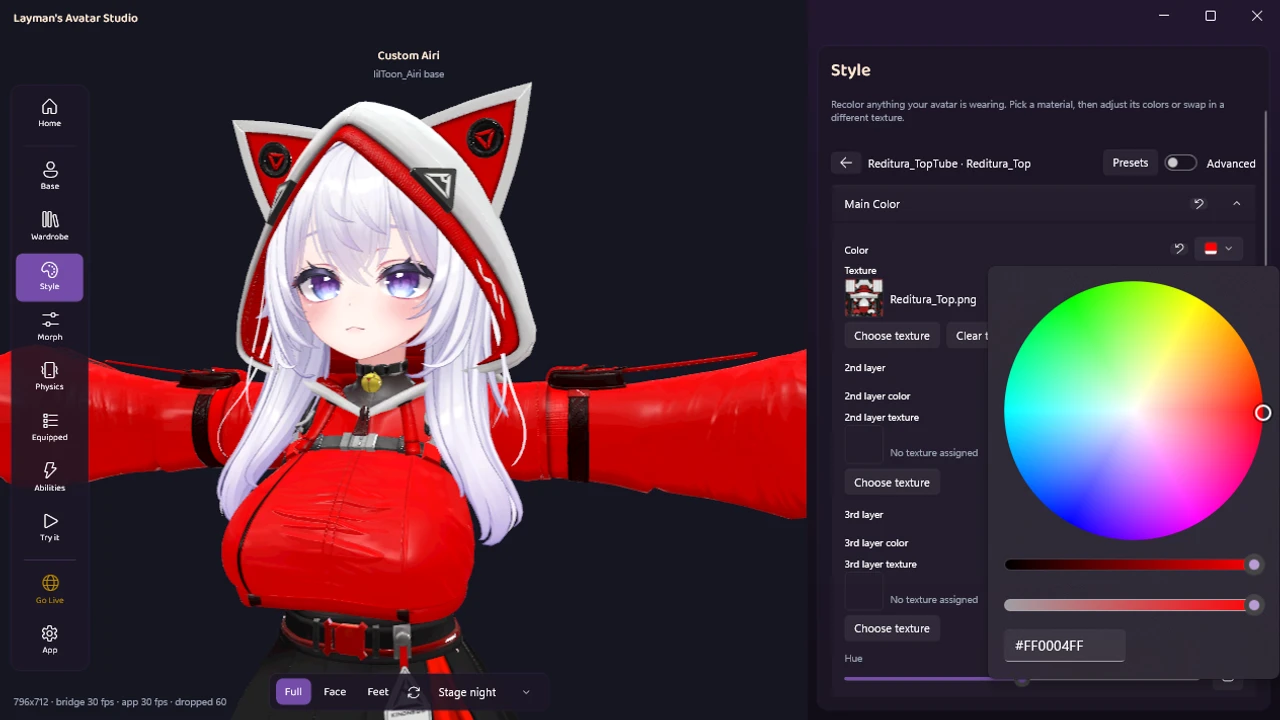
Know your two dials. Color controls come in two flavors, and knowing the difference saves confusion on every route. A tint multiplies a color over the texture: white areas take it fully, dark areas take it subtly, and the texture’s detail shows through. A hue shift rotates the colors already present: red trim becomes teal trim, but colorless areas stay put. The wheel sets tints, the hue slider shifts, and watching them act on the live avatar teaches the difference faster than any paragraph. Toon-shader materials can also carry second and third color layers, and those are exposed right in the same panel.
Change your mind freely. Everything is non-destructive. Your purchased files are never modified, every material has a reset, and un-doing a color is as fast as doing it. Swapping in a different texture entirely (creators often include variants) is the same panel. When it looks right, Try it runs the avatar live, and Go Live uploads it through the official VRChat SDK, colors baked in.
The honest print, as always: LAS is available now, Windows-only, and the deep-repaint route (painting new patterns onto a texture) is image-editor territory, not what a shader-level recolor does. Which brings us to limits.
What recoloring can and cannot do
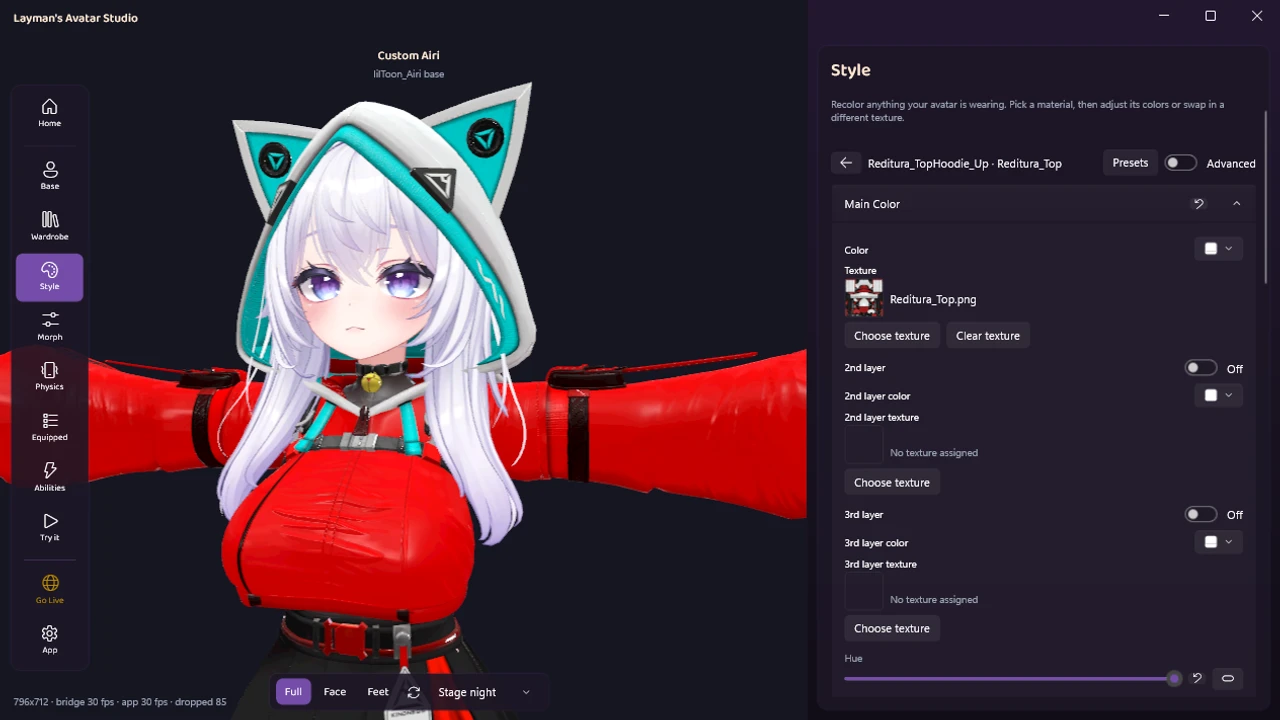
A hue shift moves color, not detail, and being upfront about that beats letting you find out later. Here is the same avatar’s hood with the hue slider dragged to the far end: the red trim has swung to teal, and the white fabric has not moved, because white has no hue to shift.
The practical rules, which apply to every route, not just LAS:
- White, black, and gray barely respond to hue. They have little or no color to move. Tinting can help (a white shirt takes a pastel tint nicely), but turning pure white into deep crimson is texture-repaint territory.
- Patterns keep their pattern. A plaid skirt hue-shifted is differently colored plaid. Removing the plaid is a repaint.
- Parts that share a texture move together. If the eyelashes live on the face texture, recoloring one touches the other. Separate materials mean separate control, which is one more reason well-made bases are worth choosing carefully.
- Baked shading stays. Shadows and highlights painted into the texture keep their character under a new tint.
LAS does not remove these limits, nothing shader-level does. What it changes is that you see them instantly on the live avatar instead of after an export, an import, and an upload.
Picking colors that actually look good
Tools remove the friction, not the taste, so three habits that carry most of the weight:
- Steal from a reference. A character you love, an album cover, a photo of an outfit: grab its colors with any color picker and paste the hex codes. Working from a reference beats inventing a palette from a blank wheel almost every time.
- Two or three colors, not seven. Pick a main color, an accent, and a neutral, then repeat them across parts. The repetition is what reads as “an outfit” instead of “a pile of colored parts,” and per-material control makes the repeating easy.
- Respect the avatar’s values. Hue shifts keep a part’s lightness and the texture’s shading. Colors with similar brightness to the original tend to land naturally, while extreme jumps (pure white to near-black) are where the texture-repaint route starts calling.
Why colors look different in-world
A recolor that looked perfect can read differently inside VRChat, and the usual culprit is light. Worlds light avatars with their own colors and intensities, and toon shaders have settings for how much world lighting influences them. A warm sunset world will warm your whites, and a dim club will crush your dark tones. Two practical habits: judge your colors in a neutral, well-lit world before deciding they are wrong, and if your avatar seems to soak up the world’s colors far more than other people’s avatars do, the material’s lighting settings, not your color choice, are the thing to look at.
Quick answers
Can I just change the hair color? Yes, hair is usually its own material, so it recolors independently. Light hair takes tints especially well. In LAS that is: open Style, click the hair, pick the color.
Will my recolor survive uploading, and will others see it? Yes. Colors are part of the avatar when it is built, so what you upload is what everyone sees. The flip side: changing colors again means uploading again, which is exactly why a painless pipeline matters.
Do I need the PSD file for this? Not for shader-level recolors like everything shown above. The layered PSD matters when you go repainting the texture itself, and it is worth checking for before you buy so the deep route stays open to you.
Can I give each eye a different color? Only if the eyes are separate materials, which depends on how the creator built the base. Shared material means shared color. When they are separate, it is just two picks in the Style panel. Changing eye textures and adding a hue shift slider covers eyes in more depth.
Am I allowed to recolor a free or purchased avatar? Almost always yes for personal use: most creator terms explicitly permit modification (改変可). It is still worth a glance at the license, especially before sharing screenshots commercially or publishing anything derived from the files.
Can I use a color picked from a picture? If you have the hex code, paste it into the hex field. Any color-picker tool that reads a pixel from an image gets you that code.
What if I make it worse? Reset the material and start over. Non-destructive means never having to say “I ruined it.”
Your colors are a wheel away
Recoloring is the gateway drug of avatar customization: the moment an avatar wears your colors instead of the defaults, it starts feeling like yours. If you have been putting it off because every guide opened with an image editor or a Unity install, that reason is gone.
LAS is available now. Download it for free, see the full tour of what else the Studio does, check what the free plan covers, and show us your color schemes in the Discord when you make them.